High Quality
Products
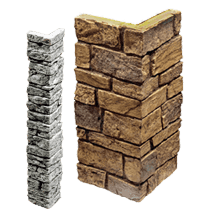
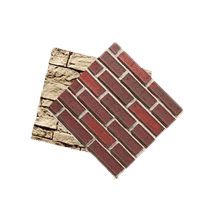
Extremely popular among DIY homeowners, designers and contractors, our faux wall panels are beautiful, durable and easy to use. They are designed to provide a versatile, affordable solution for a range of projects — including eye-catching home interiors and exteriors, innovative retail displays, restaurant décor, trade show exhibits, distinctive signage and much more.


Essentials

Why Use Texture Plus Faux Wall Panels?
Texture Plus faux wall panels enable you to create amazingly realistic environments at a fraction of the cost of traditional building materials. Here are just a few of the reasons to use Texture Plus faux wall paneling:
Affordable — Our faux wall panels are cheaper than the real thing. Plus, we will match any competitor’s price.
Durable — Our panels have been tested in every climate and come with a 25-year warranty!
Easy to Install — Our lightweight paneling is designed with ease of installation in mind for contractors, professional designers and DIY homeowners.
Custom Colors — Unlike most competitors, we can match any color you need for your project!
Made in the USA — All of our faux wall panels are manufactured at our U.S.-based headquarters in the Charlotte N.C. area- enabling us to guarantee the absolute highest quality.